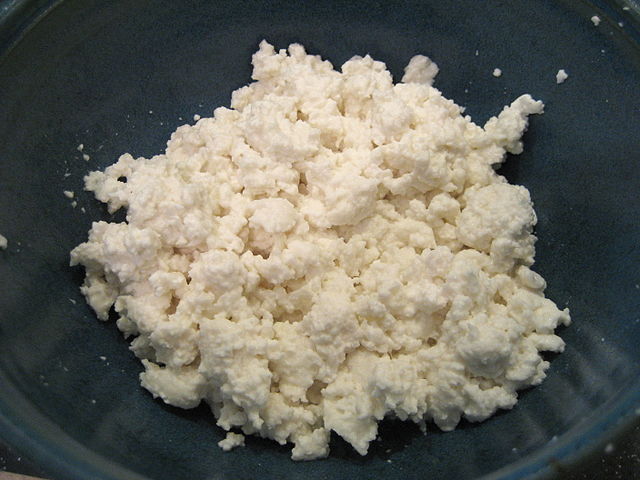
Making Homemade Cottage Cheese
Before electric refrigeration, milk often soured before it could be used, But sour milk was not wasted. Often it was allowed to clabber or get thick, and then made into cottage cheese.
Cottage cheese was also called Dutch, Curd, Sour Milk cheese or Smearcase.
The milk you buy from grocery stores in the U.S. is pasteurized (heated). When pasteurized, many of the beneficial bacteria are killed. The beneficial bacteria is what causes raw milk to sour naturally. When pasteurized milk sours, it just goes bad.
INFORMATION BELOW FROM 1800s COOKBOOKS
Cottage cheese is the easiest and quickest to make of all cheeses, and a particularly good food. It is less expensive than most foods rich in protein, and if properly made, is very digestible. As it can be seasoned and served in a variety of ways, it makes a delightful addition to lunches or other light meals in which a protein dish, such as meat is undesirable.
Skim milk does very well for this kind of cheese. If the sour milk that is to be used has cream on it, the cream should be removed before the cheese is made. Otherwise, it will remain in the whey and be lost. In case cream is desired to improve the texture and flavor of the cheese, it should be added after the cheese is made.
TO MAKE COTTAGE CHEESE
To make cottage cheese, allow a quantity of sour milk to clabber, that is, become curdled. Then place it on the back of the stove in a thick vessel, such as a crock, until the whey begins to appear on the top. Turn the vessel occasionally so that it will heat very slowly and evenly. Do not allow the temperature to rise above blood heat or the curd will become tough and dry.
Cheese made in this way may be flavored with anything desirable, such as chopped pimiento, parsley, olives, or nuts. The dry curd mixed with any of these makes a delightful salad when it is pressed into balls, garnished with lettuce, and served with salad dressing.
Cottage Cheese No. 2 ~ Skim a pan of well thickened sour milk and cut it carefully into two-inch squares. Set it into a cool oven on an iron ring or something to keep it from the bottom of the oven, and leave the door open. Turn the pan occasionally but do not stir the milk. If milk is stirred while thickening or while heating, it will yield only about a third as much cheese as it would otherwise.
Be careful not to let it get too warm. It should never be hot, only a little above blood heat. When the curd and whey have separated, pour all into a bag and hang up to drain. Do not drain the curd too dry. Season with sweet or sour cream and a little salt. Pile in a rocky mass in a glass dish and set in a cool place.
Cottage Cheese No. 3 ~ Pour at least two quarts of boiling water into one quart thick sour milk. Allow the mixture to stand until the curd separates from the whey. Strain the mixture in a cloth, pressing the cloth until the curd is dry, or allow it to drip for several hours or overnight. Put the curd in a bowl, add one-fourth teaspoon salt and a little cream or melted butter, and mix thoroughly. Serve lightly heaped, or molded into balls.
Cottage Cheese #4 ~ A very rich and tasty variety is made of equal parts whole milk and buttermilk* heated together to just under the boiling point. Pour into a linen bag and let drain until next day. Then remove, salt to taste and add a bit of butter or cream to make a smooth, creamy consistency, and pat into balls the size of a Seville orange.
*buttermilk – the liquid left over after churning butter, using cream from fresh milk. Most modern buttermilk is cultured, using pasteurized milk.
FRESH MILK COTTAGE CHEESE
If you have no sour milk, add to each four quarts of milk one cup of lemon juice and let it stand until coagulated. Then heat slowly, but do not boil, until the curd has entirely separated from the whey. Turn the whole into a colander lined with a square of clean cheese cloth, and drain off the whey. Add to the curd a little salt and cream, mix all together with a spoon or the hands, and form into cakes or balls for the table. The use of lemon gives a delicious flavor, which may be intensified, if desired, by using a trifle of the grated yellow rind.
USING RENNET
Warm three half pints of cream with one half pint of milk, and put a little rennet* to it. Keep it covered in a warm place till it is curdled. Have a proper mold with holes, either of china or any other. Put the curds into it to drain, about one hour or less. Serve it with a good plain cream, and pounded sugar* over it.
*rennet – the rennin-containing substance from the stomach of the calf, used to curdle milk, as in making cheese, junket, etc.
*pounded sugar – sugar used to be sold in cones or loaves. You would cut some off and pound it to a specific amount for a recipe.
=================================================
Find Local, Organic Raw Milk in the U.S.
=================================================
=================================================
Do You Like Cottage Cheese? Have You Ever Tried Raw Milk?
Please Leave a Comment Below.
=================================================


3 thoughts on “Making Homemade Cottage Cheese”
My Mom made homemade cottage cheese at least once when we were growing up on the farm. It was a very different consistency than our store bought cottage cheese. I did grow to like it before it was gone. The salt she added at the end was very necessary to enjoying it. We never tried other seasonings but that would be interesting to check out if I could find some affordable fresh milk!
I’ve never tried this, but it sure sounds a darned sight better than the stuff from the grocery. So if I can find some raw milk I just may try it. BTW, I sent your article about how to keep eggs longer when hens aren’t laying in the winter, to my daughter in Oklahoma. She has chickens and was thrilled to get this information. I love your vintage recipes!!
Thank you for sharing my post with your daughter. I love going through old cookbooks. One of these days I’m going to get my own place and practice some of the things I learn. In the meantime, I buy organic if I can, and try to eat natural and wholesome foods. I’m glad you’re enjoying the vintage recipes.